Channels
Google Business Profile
Connect your Google Business Profile, import or match your locations, and keep your listings on Google Search and Maps in sync.
Your Google Business Profile is often the first thing customers see when they search for you: your address, phone number, opening hours, and reviews on Google Search and Google Maps. Shoppy Connect keeps those listings in sync with your stores, so you can manage all of your locations from one place instead of editing each one in Google.
In Shoppy Connect, Google Business Profile appears under its former name, Google My Business.
Before you start
You need:
- The Google My Business channel connected. Go to Channels, find Google My Business, and click Connect. Sign in with the Google account that manages your business listings.
- Access to the Google account that owns or manages your Business Profile locations.
See Channel sync for more about connecting channels.
The Google menu
Everything to do with Google locations starts from the Google menu on the Stores page.
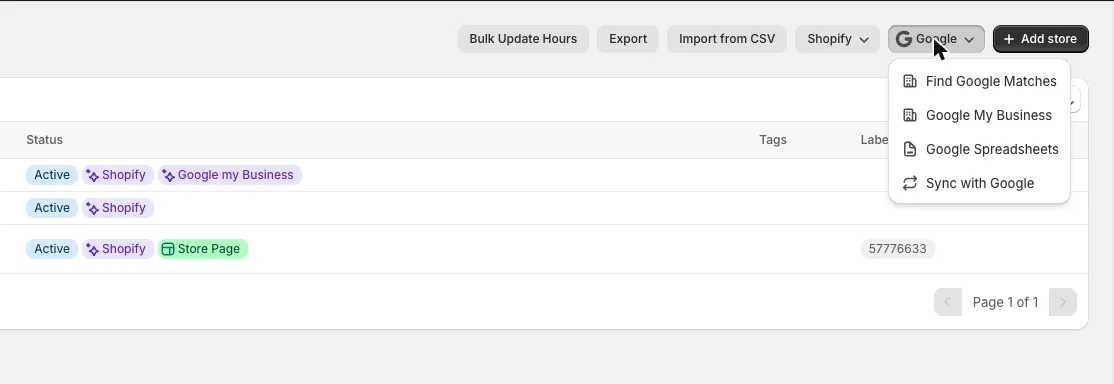
| Option | Use it to |
|---|---|
| Find Google Matches | Link stores you already have in Shoppy Connect to their Google listings. |
| Google My Business | Import locations from your Google Business Profile as new stores. |
| Google Spreadsheets | Work with your stores in a Google Sheet. |
| Sync with Google | Start a sync with Google straight away, without waiting for the schedule. |
Import your Google locations
If your locations are already on Google but not yet in Shoppy Connect, import them instead of typing them again.
-
On the Stores page, click Google › Google My Business.
-
Click Select account and choose the Google account that manages your locations.
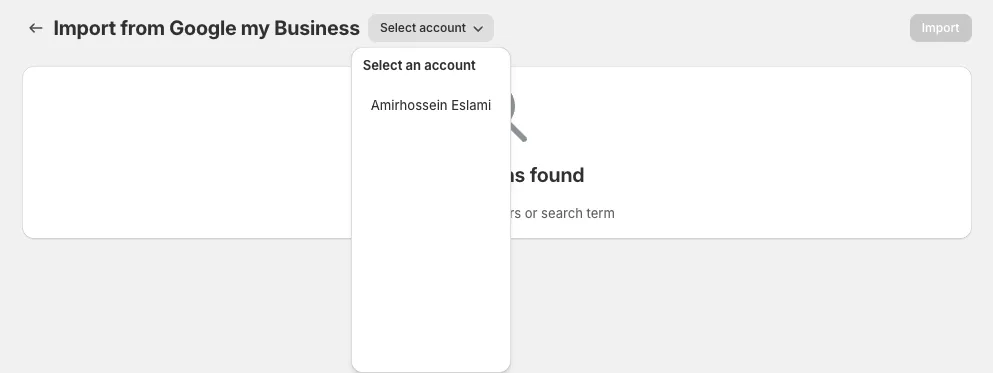
-
Your Google locations are listed with their name and address. Tick the locations you want to import.
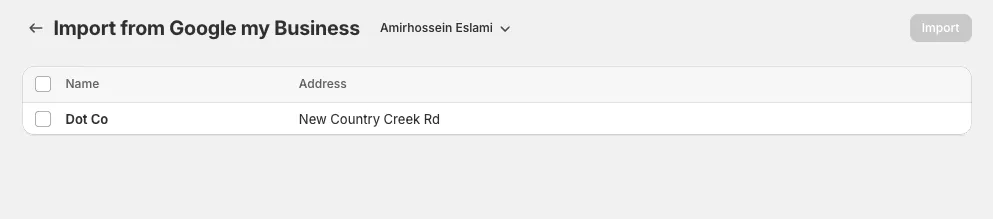
-
Click Import.
The imported locations appear in your Stores list, already linked to Google.
Match existing stores to Google
If you already have stores in Shoppy Connect and listings on Google, link each store to its listing so Shoppy Connect knows which one to keep up to date.
- On the Stores page, click Google › Find Google Matches.
- The bar at the top shows how many of your stores are already matched.
- For each store, search for its Google listing in the Google Store column and choose it. Click Suggest all to let Shoppy Connect suggest a match for every store.
- Check the matches, then click Save.
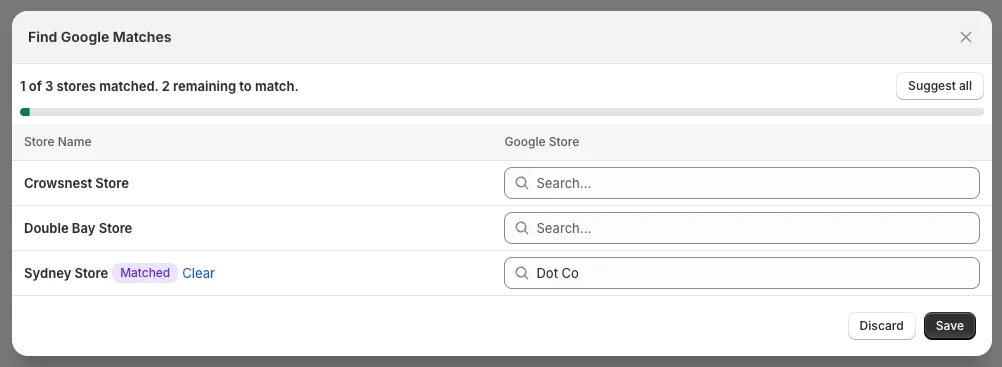
A matched store shows a Matched badge. To unlink a store, click Clear next to it, then click Save. Click Discard to close without changing anything.
A store linked to Google shows a Google my Business badge in the Status column of the Stores list.
Sync settings
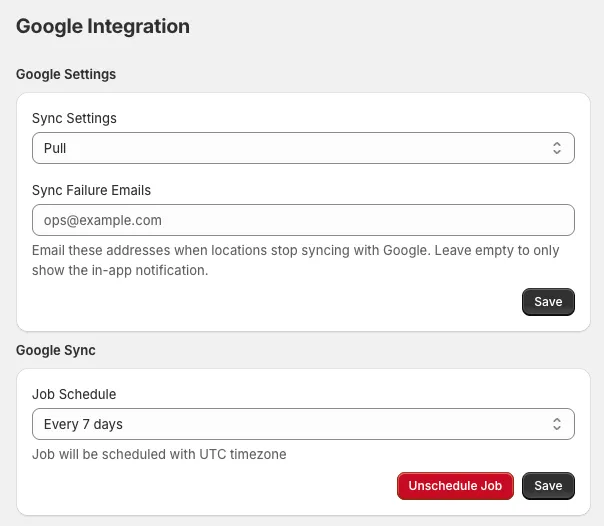
Choose how and when Shoppy Connect syncs with Google under Settings › Google.
Sync direction
Sync Settings decides which side is the source of truth:
- Pull: Shoppy Connect takes the latest details from Google and updates your stores.
- Push: Shoppy Connect sends your store details to Google and updates your listings.
Choose Push if your team manages store details in Shoppy Connect. Choose Pull if your team still edits listings directly in Google and you want Shoppy Connect to follow them. Click Save after changing it.
Sync failure emails
Add the email addresses that should be told when locations stop syncing with Google, then click Save. If you leave this empty, failures are shown only as a notification in the dashboard.
Sync schedule
Under Google Sync, pick how often the sync runs from Job Schedule:
- Daily at midnight
- Every 7 days
- Every 30 days
Click Save to start the schedule. The schedule runs on UTC time, so “midnight” means midnight UTC, not your local time.
To stop automatic syncing, click Unschedule Job. You can still sync any time from Google › Sync with Google on the Stores page.
Google Sheets
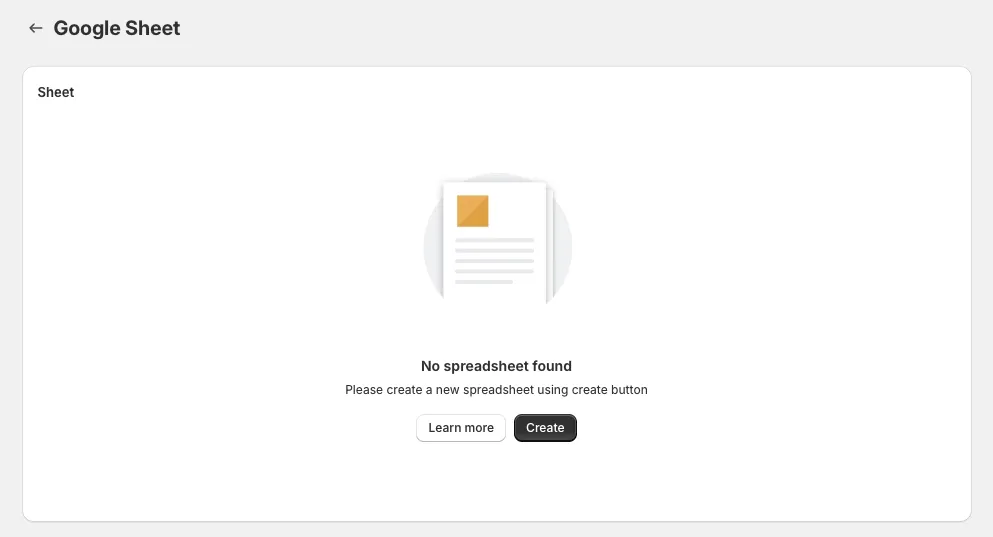
Google › Google Spreadsheets connects your stores to a Google Sheet. If you don’t have one yet, click Create to make a new spreadsheet.
Google reviews
Open a store and go to its Reviews tab to see the Google reviews for that location.
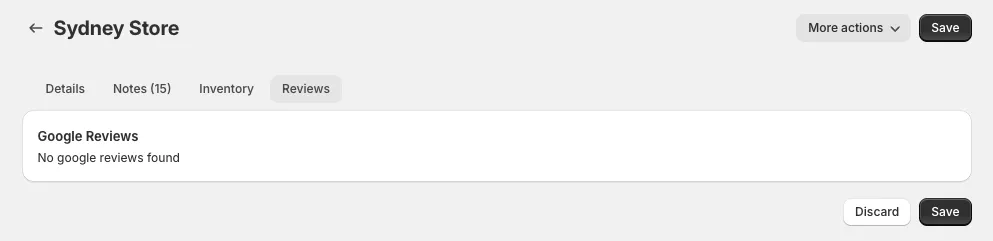
Reviews appear only for stores that are matched to a Google listing. If you see No google reviews found, check that the store is matched, using Find Google Matches.
Tips
- Match every store to Google before you switch on Push, so no listing is left out.
- Decide on one place where your team edits store details, and set Sync Settings to match. Editing the same details in both places can overwrite changes.
- Use special dates for public holidays. Google shows holiday hours to customers, and a missing one is a common cause of wasted trips.
- Add at least one address to Sync Failure Emails, so problems aren’t missed when nobody is logged in.
Troubleshooting
My Google locations don’t appear when I import. Make sure you chose the right account under Select account. The list only shows locations that Google account can manage.
A store’s details aren’t changing on Google. Check that the store has a Google my Business badge in the Stores list, that Sync Settings is set to Push, and that a Job Schedule is saved. To send changes now, use Google › Sync with Google.
Google keeps overwriting my changes. Sync Settings is probably set to Pull, so Google is the source of truth. Switch it to Push if you want Shoppy Connect to be the source of truth.