Locations
Add and edit a location
Edit a location's contact details, address, map pin, status, and tags in Shoppy Find in Store, or delete it.
Each location is one of your stores. Its details show in the Find in Store widget when customers look for stock nearby.
To add your stores, import them from Shopify. That links each store to its Shopify inventory, so the widget can show its stock. Then use this guide to fill in and edit their details.
Edit a location
- Go to Locations.
- Click the location, or click ⋯ › Edit on its row.
- Change what you need.
- Click Save.
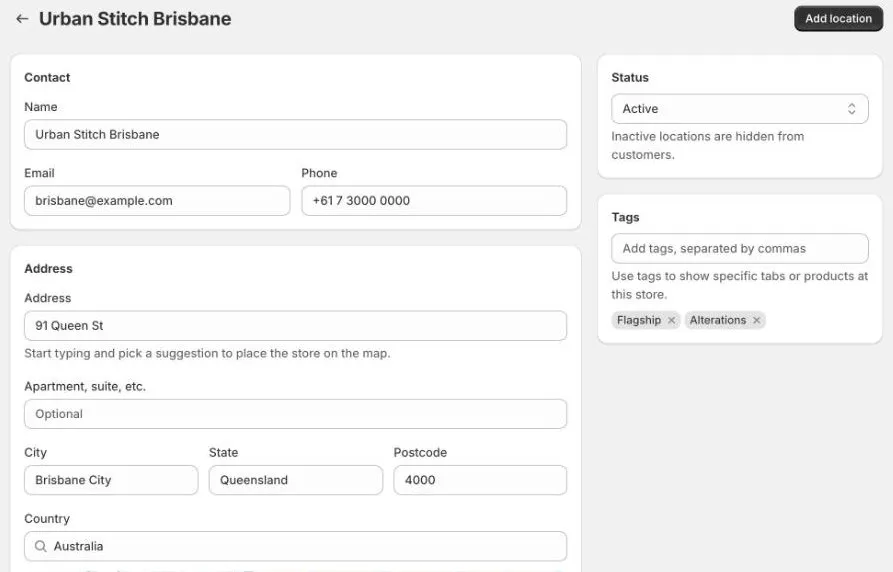
Contact
- Name: the store name customers see, for example
Urban Stitch Brisbane. - Email and Phone: shown in the store’s details in the widget.
Address
- Start typing in Address and pick a suggestion. The city, state, postcode, and country fill in for you, and the store is placed on the map.
- Add a unit or shop number in Apartment, suite, etc. if needed.
- Check the pin on the map. Drag it if the store’s entrance is somewhere else.
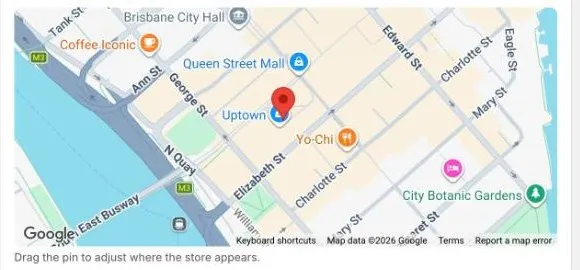
Address suggestions need a Google Maps API key. Without one, you can still type the address by hand. See Get a Google Maps API key.
The distance to each store is worked out from its address in Shopify, not the address in the app. If you move a store, update its address in Shopify too.
Trading hours and special dates
Set the store’s weekly hours, and add holidays or one-off changes. See Trading hours and special dates.
Status
- Active: customers can see the store in the widget.
- Inactive: the store is hidden from customers. Use this for a store that’s closed for a while, without losing its details.
Tags
Type tags separated by commas, for example Flagship, Alterations, and press Enter. Tags help you find and filter stores on the Locations page, and show on the Inline Nearest Store theme block.
Use the same spelling and capitals each time, so the same tag isn’t listed twice.
Add a location by hand
Click Add location, then Add manually. Fill in the form and click Add location.
New locations start with your default trading hours.
A location added by hand isn’t linked to a Shopify location, so the widget can’t show stock for it. In most cases, add the location in Shopify and import it instead.
Delete a location
- Open the location.
- Click Delete location at the bottom of the page, then confirm.
You can also click ⋯ › Delete on its row in the list.
Deleting a location can’t be undone. Customers no longer see the store, and its hours and special dates are removed from the app. The location in Shopify isn’t deleted, so you can import it again, but you’ll need to set it up again.
To hide a store for now, set it to Inactive instead.